A simple way to make custom curtain rods is to find ones with screw off ends. These are tin candy boxes that cost around $5 a piece. Drill a hole in the center of one side. Slide it on to curtain rod end and use a washer and bolt to attach it. Simple and awesome!.
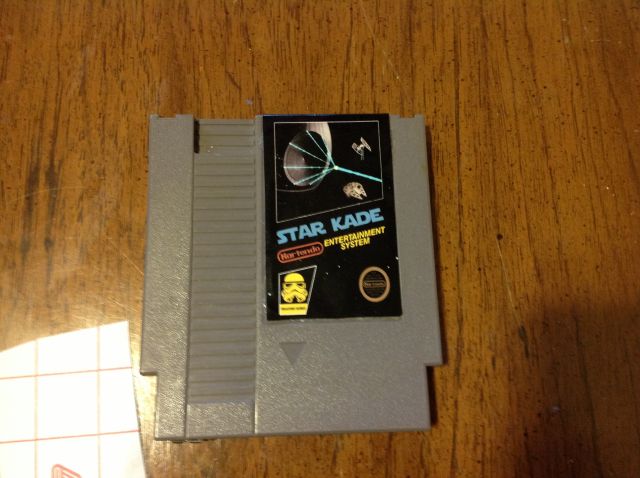
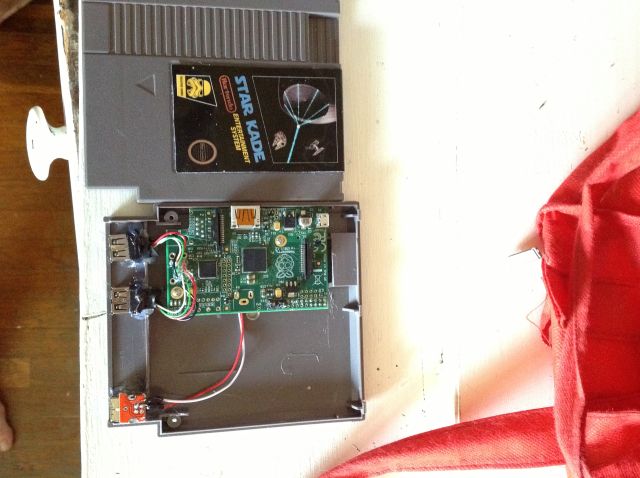
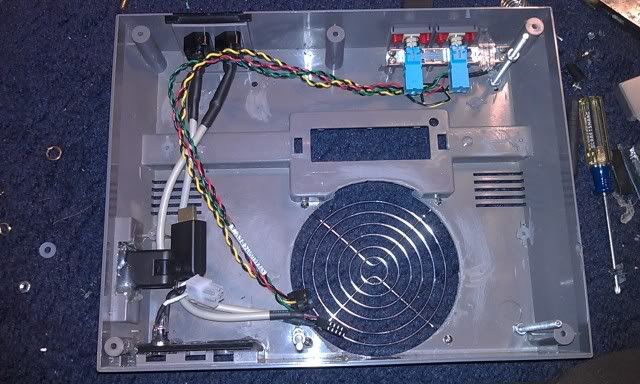
Been a while since I've posted stuff. The Pi Cart is fully assembled. I replaced the 2 USB connectors with 2 covered connectors. I had problems with glue getting in the other ones when I was try to get them into place. Designed a new NES label as well.
Here's what it sort of looks in the inside. The controller USB ports and the power port switched places when I changed to the new USB connectors.
It's pretty much done. I wanted to use some USB SNES controllers just because I needed more buttons to play different systems, but when I updated to the new RetroPi version it's broke the driver or something. So I just ended up using 2 Phillips Recoil controllers. They aren't the best, but they do the job well enough.
Well after messing around with the settings i figure out how to make the screen go from squish to this. Although it looks blurry it's pretty clear. Just a bad pic.
Lack of VGA out is one the biggest complaints people have with the Pi. Luckily there is a solution for that with this little converter. You won't be able to use it right away until you change some settings on the Pi to force output, but once you do you'll be good to go.
Finally bought a Raspberry Pi. Seems pretty neat so far. If this project goes well I will probably buy acouple of more. I like the idea of having an old 300mhz computer in my pocket. Those are the computers that got me hooked in the first place so it's only fitting that I go back to my roots. Instead of blowing a ton of money restoring a millipede cab, I'm going to attempt to do it with a slice of raspberry pi and and LCD upgrade. More to follow soon.
So I've been talking about different projects I'd like to do, and not sticking to projects I say I'm gonna start. Originally the Spintendo was dead as of last post...Well using a PC in inside the Nintendo shell is still dead...However, with that being said I'm going to take some advice from someone on the Hyperspin forums and use a Wii. I already tore down the Wii yesterday so there's really no going back. I stole this photo from engadget...so in a nutshell this is what it looks like so far.
Lets talk about goals. The software end is pretty easy. I'll use priiloader to load directly into the the emulator, which in turn, will bypass the Wii OS. The Video connector will go on the side where the AV ports go. Power and Sensor connector will go to the back, and 2 Gamecube controller hooks up in the front.
Now comes the hard part...Wireless NES controllers. So some how I need to figure out how to shove a wii mini remote inside, wire it up so it works, add a rechargeable battery, a charging port, and power switch in the very tiny amount of space I have. I don't know if it will be possible, but I know I'm going to try. Only the bare minimum will be on the controller. So anything I don't need that I can take off will be taken off.
Time to bring in the new year with some new ideas and throw out the old. First and foremost, I've decided to abandon the Spintendo. I know sad right :( . The idea isn't dead...infact I'm going to move into a more practical build using the raspberry pi. I've had alot of problems with sound not coming out through the hdmi. It's def a motherboard issue and not one I'm going to replace again. Basically it means no more Hyperspin...more sad faces please... :( It saddens my heart, but this is a more practical solution. Check it out.
Before the Pi Nes is started...I'll be starting my millipede cab conversion that will be featuring a rotating monitor. So if you are interested stay tuned.
Well I know my blog is mainly about the Spintendo build, but I wouldn't be doing my video game duties If I didn't report that Playstation will also be following Nintendo and ceasing production of their Playstation Magazine. What is the world coming to?
I was sad to hear that the last issue of Nintendo Power will be Dec 2012. I'll always remember the awesome reviews,comics,strategy guides, and cheats provided by this marvelous magazine. It was a huge part of my life growing up and will always be remembered.
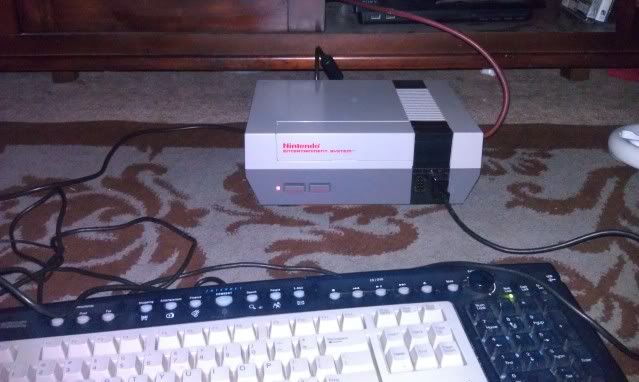
If you are in the market to build an NES PC then today would be a good day to buy your retro chips. Head on over Retrousb.com and pick yourself up some NES/SNES chips for just $14 a piece. It's a pretty good deal if you ask me.
I have ADD when it comes to working on projects. I'm actually taking a break from the Spintendo to work on a new project which involves a millipede arcade cab. I'll be converting it into a cab that plays Point and Click adventures such as Maniac Mansion, Sam and Max...ect. More to come on that later. I know it's not as cool as the Spintendo, but like I said, I have Project ADD. I guess I always like to keep busy with one project or another.
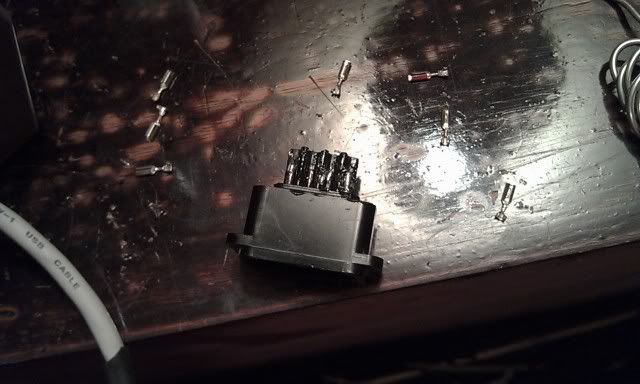
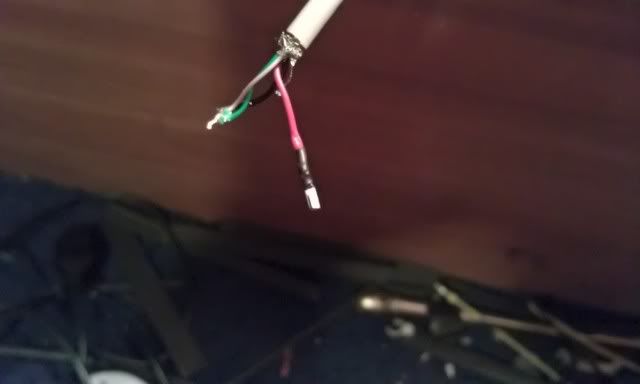
I decided it was time to redo the soldering job on the NSB ports. They were pretty terrible. I had never really soldered before so they look like crap to say the least. Also it made the pins really lose since the heat melted the plastic. So here's the old and the new. The pic new doesn't show them connected yet, because I purchased another broken nintendo for dirt cheap on ebay to replace the melted and shotty ports.
Old Way
And the new way
The new way uses the original pins to connect to the port instead of soldering them directly.
So it was a long shot, but I decided to pull the motherboard battery. Well after I did that it's back to normal. I'm not sure the hdmi will output sound but at least I have everything back and running.
Well another major motherboard failure has deemed this prjoect dead. I'm calling it quits. This motherboard also produces no sound from the hdmi, and will no longer boot any OS from a hard drive. Zotac produces very low quality products...at least the ones I've recieved. It was the first and last product I'll buy from them. Game Over and I'm out of continues.
After many months of waiting/delaying its back. The build is back and running and is pretty stable. I had some issues trying to install xp via usb,but other than that its running well.
Speaking of xp via usb...don't! Just save yourself the trouble...spend 10 bucks and buy a crappy usb cd rom. Trust me it will save you from a lot of headaches. Windows 7 on the otherhand will install pefrectly. I wanted xp...therefore I must of wanted some headaches. Everything is running good now though.
Right now I'm setting up my controls to run with joy2key. It will make operating Hyperspin a lot easier.
Well here is the final tear down...at least I sure as heck hope it is. I can tear this bad boy down while being blind folded and hung upside down.
I re-soldered my power connectors and added some shrink tubing as well to make it a little more seamless. Turned out quite nice...especially since the soldering number I did on it the first time around was absolutely horrendous.
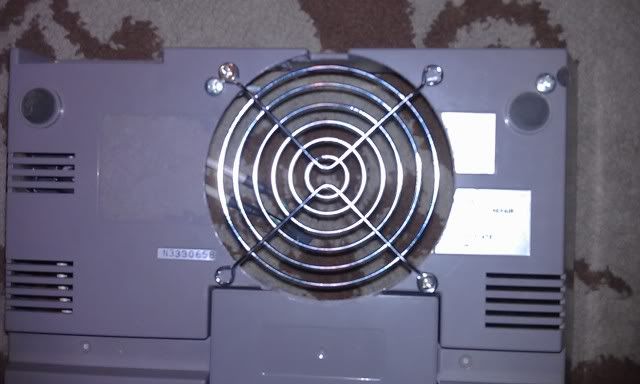
I also added a grill finally and added some shrink tube around the NSB connections as well.
And last but not least...I removed the piece of credit card I used for a backing for the power supply and added a thick piece of plastic.
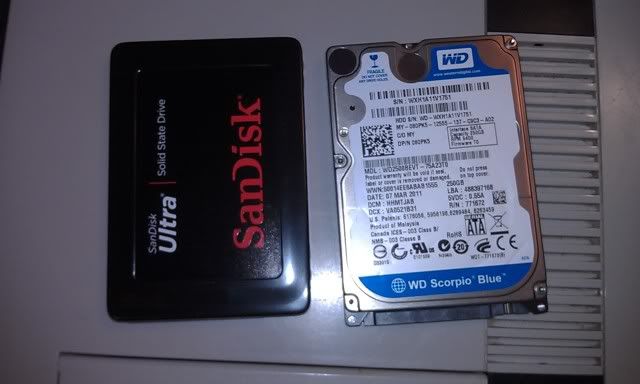
Also as I mentioned before I replaced my standard hard drive with this nice new Sandisk SSD.
Hopefully tomorrow I'll have more to post. Possibly even the cartridge art.
Well it's time to get back to the project. I pretty much just bought everything I needed to finish the project. I decided to bite the bullet and go with a 120gig SSD (Solid State Drive) Hard Drive. This will drastically reduce the heat produced because it contains no moving parts. It cost almost as much as the motherboard and processor together @ $135 so I hope it was worth it. I also purchased new some new LEDs for the power light, because I ended up breaking one of the ends off of the original by accident. Another thing I finally purchased was a fan grill to protect the fan and polish the look of the project. I bought a heat gun, and some shrink tube to protect the soldered wires as well.
As far as the new site is going...well lets just say right now it's at a stand still for now. Eventually I'll get to it.
The new site is currently down. I went to upload a new single page, and wasn't thinking and uploaded the whole old site. Which ended up breaking the wordpress install. It will be back eventually. I've been wanting to move away from using wordpress as a website(it will still be used for the blog) anyway.
So now that I got my anger out of the way...I guess this is kind of a common problem with this model. Wish I had know this earlier of course. But anyway I initiated a support ticket from zotac...and of course it's all just a waiting game. I'm sure they'll want me to pull the battery, reset the bios, and all that jazz...only to have it not work of course. Then I'm sure they'll send me an RMA and I'll be waiting some more. To make matters worse...they probably won't even send me the same board because they no longer sell this one. So as I wait(because there's no sense in doing a mod without a system to test it on) I stumbled up an interesting website. Some of you may have seen this before...and some of you have not.
It's called NESForver. Basically in a nutshell it's a place where you can play classic NES games online. So there's no need to search for roms or emulators or ask where to get them. You play the games right in your browser which I think is pretty neat. You'll need Java installed in order to get this to work. Now I experienced some slow down, but I'm willing to bet that it's my laptop. You should def check it out though.
Well Im not sure whether to be really sad or really angry. I dont know what happened here. Two days ago it was running fine with no problems...but now it will power on but no video will come up. I've tried both the dvi and hdmi and both give me the same result...nothing. I've tried unhooking everything one at a time to troubleshoot and I still get nothing. I'm so frustrated because I've put so much effort and $ into this thing only to have the motherboard die!!!!! Ahhhhhhhhhhhhhhhhhhhhhhhhhhhhhhhhhhhhhhhhhhhhhhhhhhhhhhhhhhhhhh...hhhh...hh.h.......
Well back to the drawing board I guess. If you have any ideas please hit me up.
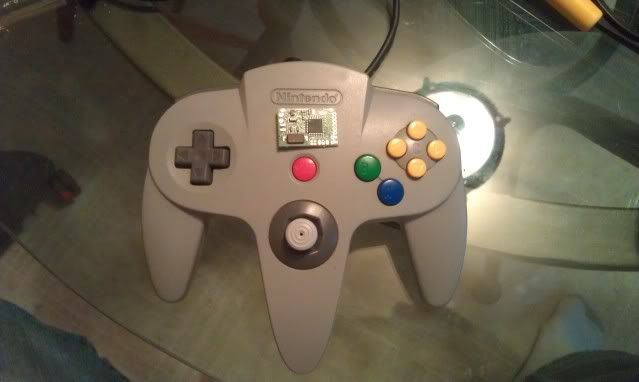
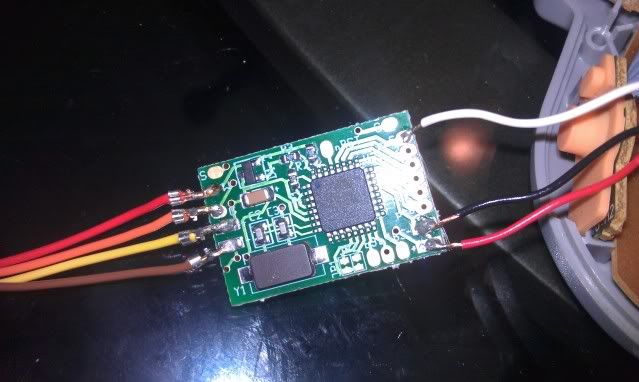
Well it went alot easier than anticipated. The chip works wonderfully. I have to admit my soldering is getting a lot cleaner as well. If you're looking to go the USB route...I highly recommend this chip. You can grab it from www.raphnet.net .
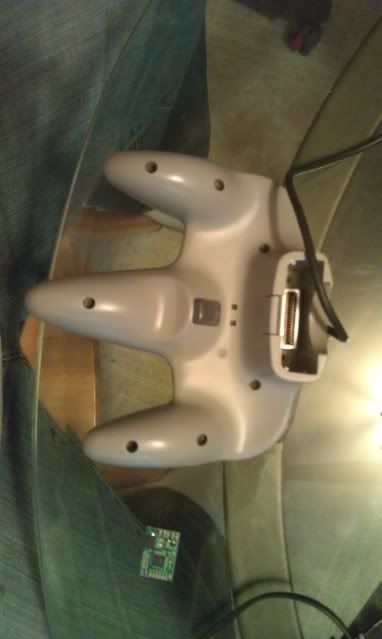
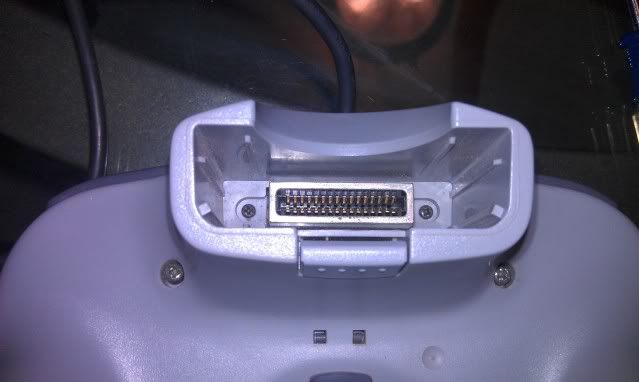
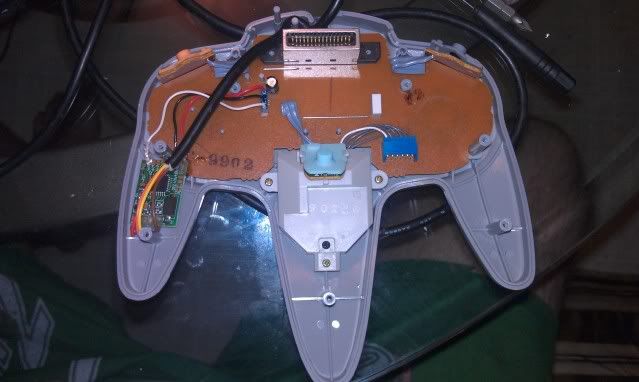
Flip the controller over and remove the 9 screws. There are 7 on the backside
And here are the other 2 are where the memory pack goes. Be careful with these because the strip easisly.
This is what you will see when your case is open
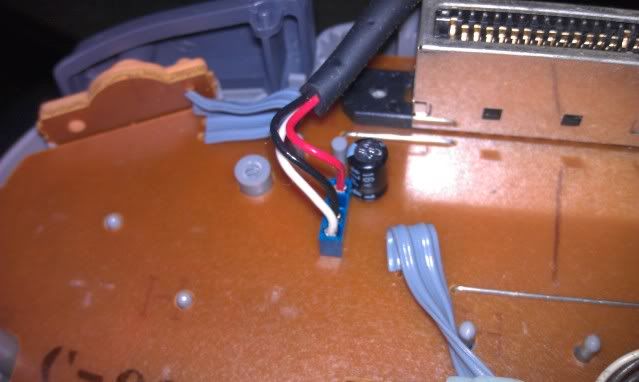
Cut your wire from the where its connected to the board to about 3 inches up. You'll want to have enough wire to move the chip where you want.
Next comes the fun part. There are only 3 wires for the N64 controller. If you look closely at the board you can see where the + and - go. The last tab on the right of the chip is where your 3.3v+ wire (red) will go. Right next to it goes the negative wire (black). Now take your last wire (white) and solder it to the second tab. The very top tab is used for the 5 volt wire for the Gamecube, but since we are using an N64 controller we won't be needing it. Now that your controller is soldered you will need to solder the NES cord. There are also + and - signs and there is a G and W for the USB wires. Everything is still color coded just like the keyboard cord. Which is...
NES USB
Brown = Red +
Yellow = Black -
Orange = Green data
Red = White data
Cover the connections with hot glue on both sides to ensure that they won't break off. Once you've done that find a place to put it.
I put mine in the bottom left hand corner between the 2 screw holes.
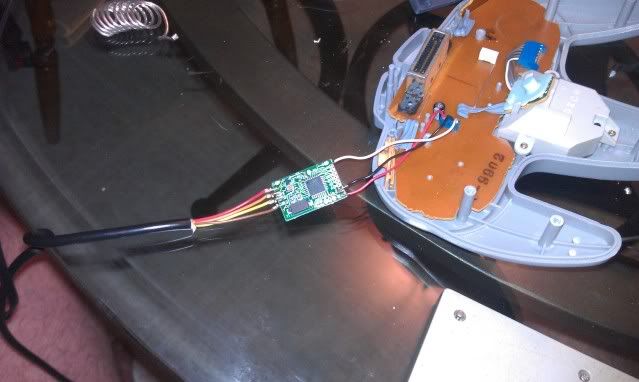
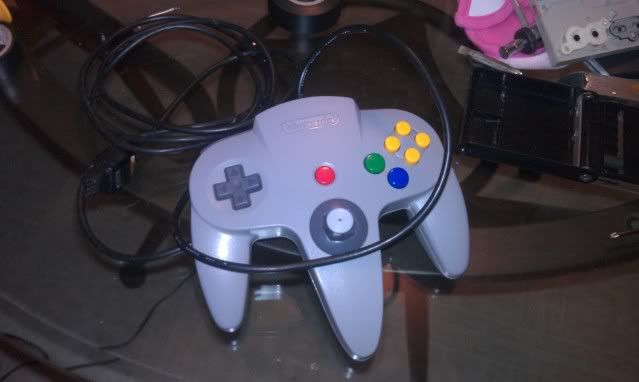
Lastly, reassemble everything and this is what you will end up with
Finally you can test you controller out. Plug it in to one of the front ports.
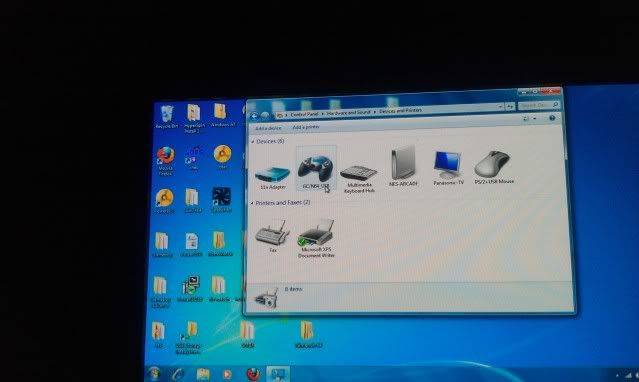
Windows will start installing the new hardware. So to see if everything installed correctly you will want to open your Control Panel and then click view hardware and devices and then this will pop up.
You should see GC/N64_USB. You'll need to open the properties to the controller and config the analog stick. If you don't do this then your your stick won't work like it should.