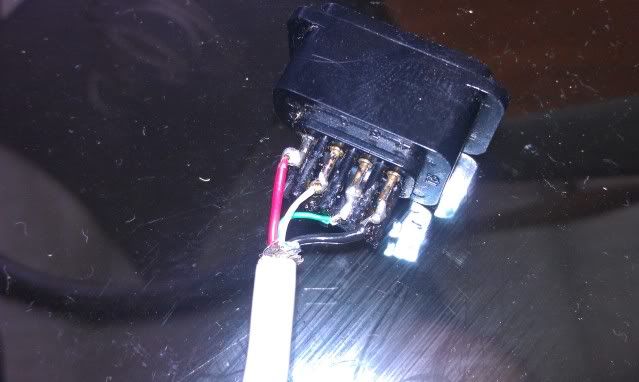
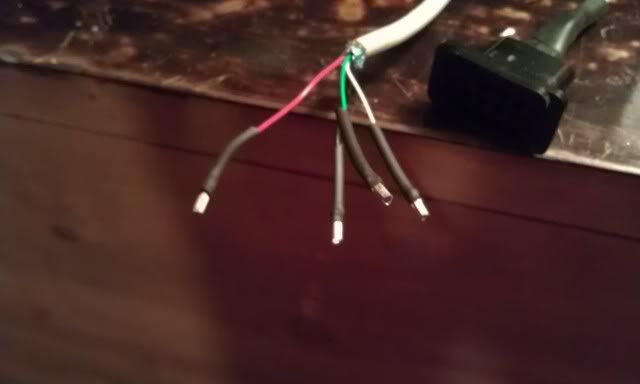
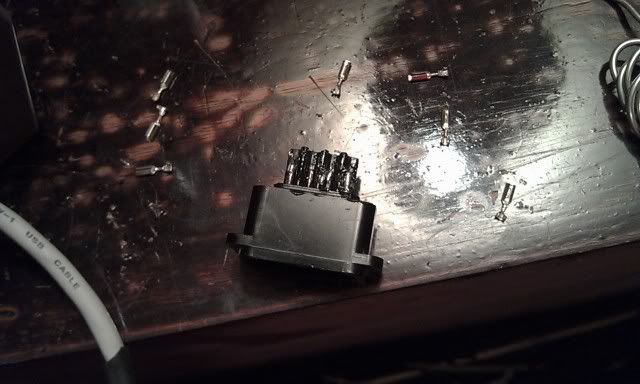
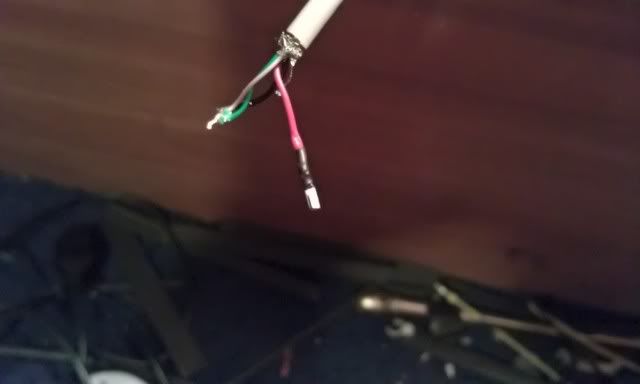
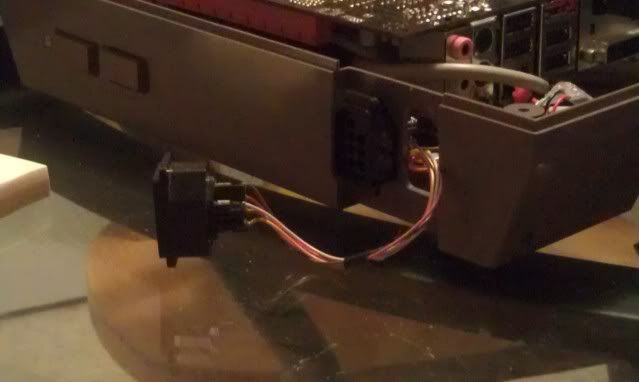
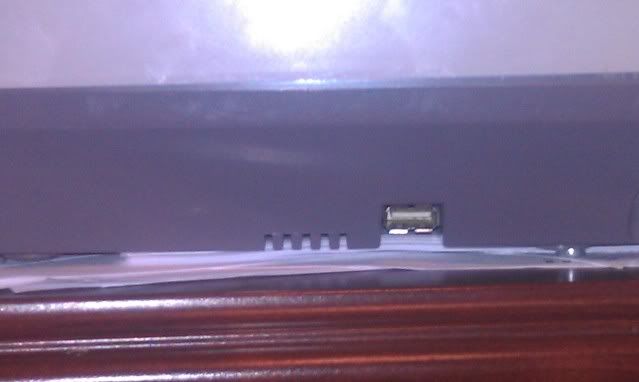
I decided it was time to redo the soldering job on the NSB ports. They were pretty terrible. I had never really soldered before so they look like crap to say the least. Also it made the pins really lose since the heat melted the plastic. So here's the old and the new. The pic new doesn't show them connected yet, because I purchased another broken nintendo for dirt cheap on ebay to replace the melted and shotty ports.
Old Way
And the new way
The new way uses the original pins to connect to the port instead of soldering them directly.
So it was a long shot, but I decided to pull the motherboard battery. Well after I did that it's back to normal. I'm not sure the hdmi will output sound but at least I have everything back and running.
Well another major motherboard failure has deemed this prjoect dead. I'm calling it quits. This motherboard also produces no sound from the hdmi, and will no longer boot any OS from a hard drive. Zotac produces very low quality products...at least the ones I've recieved. It was the first and last product I'll buy from them. Game Over and I'm out of continues.
After many months of waiting/delaying its back. The build is back and running and is pretty stable. I had some issues trying to install xp via usb,but other than that its running well.
Speaking of xp via usb...don't! Just save yourself the trouble...spend 10 bucks and buy a crappy usb cd rom. Trust me it will save you from a lot of headaches. Windows 7 on the otherhand will install pefrectly. I wanted xp...therefore I must of wanted some headaches. Everything is running good now though.
Right now I'm setting up my controls to run with joy2key. It will make operating Hyperspin a lot easier.
Well here is the final tear down...at least I sure as heck hope it is. I can tear this bad boy down while being blind folded and hung upside down.
I re-soldered my power connectors and added some shrink tubing as well to make it a little more seamless. Turned out quite nice...especially since the soldering number I did on it the first time around was absolutely horrendous.
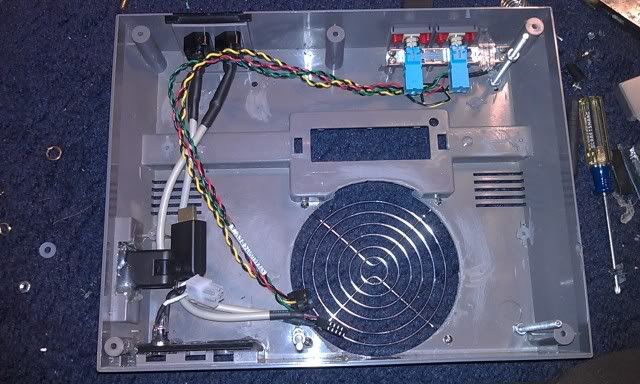
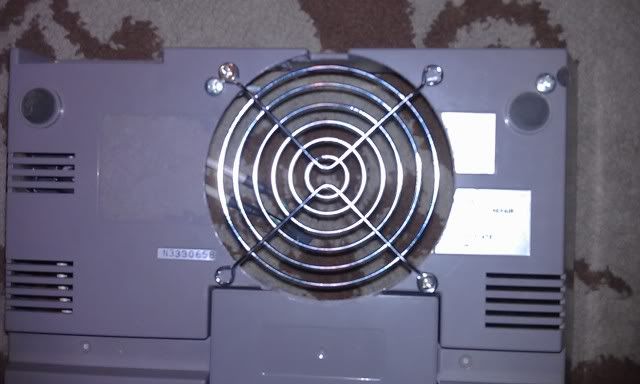
I also added a grill finally and added some shrink tube around the NSB connections as well.
And last but not least...I removed the piece of credit card I used for a backing for the power supply and added a thick piece of plastic.
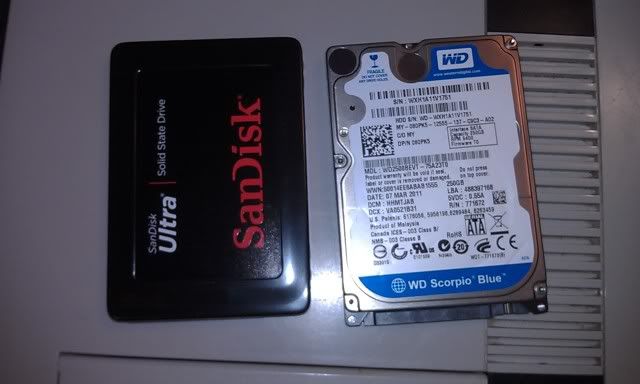
Also as I mentioned before I replaced my standard hard drive with this nice new Sandisk SSD.
Hopefully tomorrow I'll have more to post. Possibly even the cartridge art.
Well it's time to get back to the project. I pretty much just bought everything I needed to finish the project. I decided to bite the bullet and go with a 120gig SSD (Solid State Drive) Hard Drive. This will drastically reduce the heat produced because it contains no moving parts. It cost almost as much as the motherboard and processor together @ $135 so I hope it was worth it. I also purchased new some new LEDs for the power light, because I ended up breaking one of the ends off of the original by accident. Another thing I finally purchased was a fan grill to protect the fan and polish the look of the project. I bought a heat gun, and some shrink tube to protect the soldered wires as well.
As far as the new site is going...well lets just say right now it's at a stand still for now. Eventually I'll get to it.
The new site is currently down. I went to upload a new single page, and wasn't thinking and uploaded the whole old site. Which ended up breaking the wordpress install. It will be back eventually. I've been wanting to move away from using wordpress as a website(it will still be used for the blog) anyway.
So now that I got my anger out of the way...I guess this is kind of a common problem with this model. Wish I had know this earlier of course. But anyway I initiated a support ticket from zotac...and of course it's all just a waiting game. I'm sure they'll want me to pull the battery, reset the bios, and all that jazz...only to have it not work of course. Then I'm sure they'll send me an RMA and I'll be waiting some more. To make matters worse...they probably won't even send me the same board because they no longer sell this one. So as I wait(because there's no sense in doing a mod without a system to test it on) I stumbled up an interesting website. Some of you may have seen this before...and some of you have not.
It's called NESForver. Basically in a nutshell it's a place where you can play classic NES games online. So there's no need to search for roms or emulators or ask where to get them. You play the games right in your browser which I think is pretty neat. You'll need Java installed in order to get this to work. Now I experienced some slow down, but I'm willing to bet that it's my laptop. You should def check it out though.
Well Im not sure whether to be really sad or really angry. I dont know what happened here. Two days ago it was running fine with no problems...but now it will power on but no video will come up. I've tried both the dvi and hdmi and both give me the same result...nothing. I've tried unhooking everything one at a time to troubleshoot and I still get nothing. I'm so frustrated because I've put so much effort and $ into this thing only to have the motherboard die!!!!! Ahhhhhhhhhhhhhhhhhhhhhhhhhhhhhhhhhhhhhhhhhhhhhhhhhhhhhhhhhhhhhh...hhhh...hh.h.......
Well back to the drawing board I guess. If you have any ideas please hit me up.
Well it went alot easier than anticipated. The chip works wonderfully. I have to admit my soldering is getting a lot cleaner as well. If you're looking to go the USB route...I highly recommend this chip. You can grab it from www.raphnet.net .
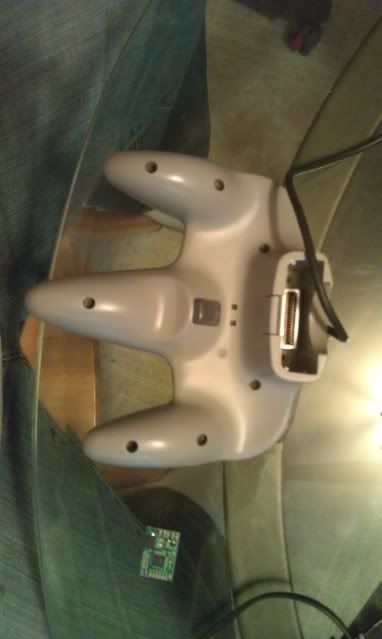
Flip the controller over and remove the 9 screws. There are 7 on the backside
And here are the other 2 are where the memory pack goes. Be careful with these because the strip easisly.
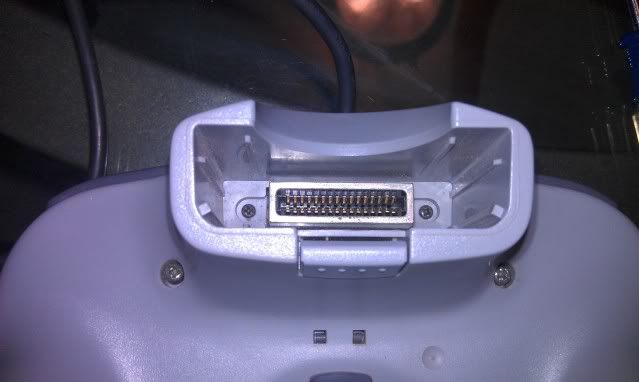
This is what you will see when your case is open
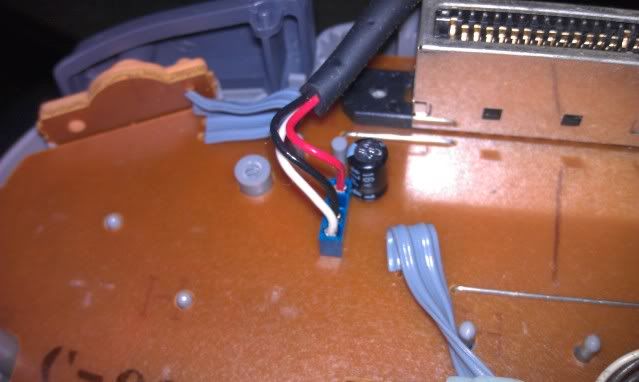
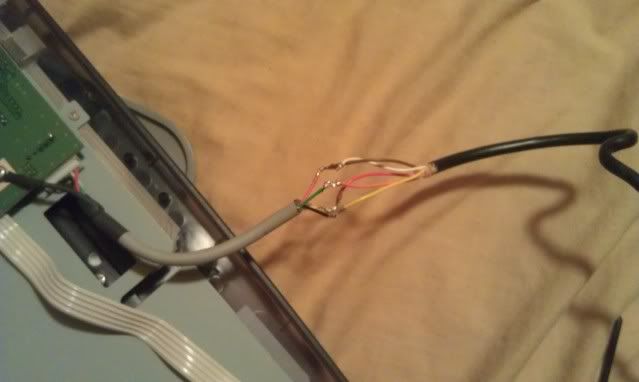
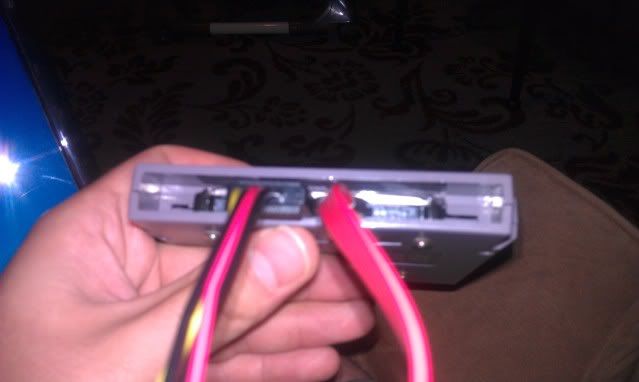
Cut your wire from the where its connected to the board to about 3 inches up. You'll want to have enough wire to move the chip where you want.
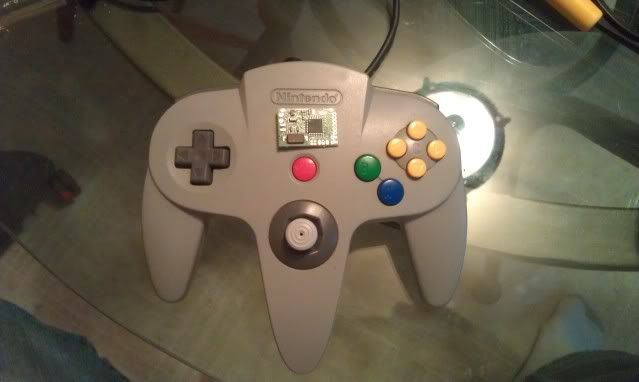
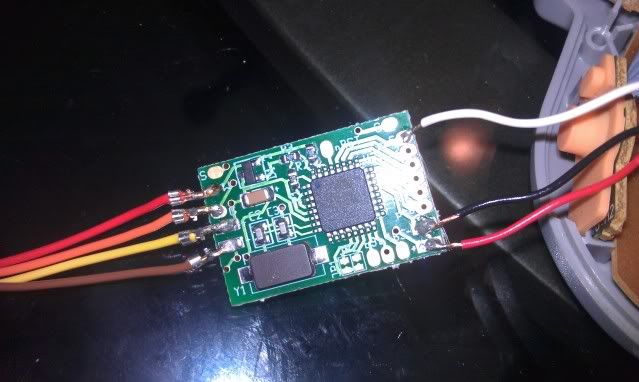
Next comes the fun part. There are only 3 wires for the N64 controller. If you look closely at the board you can see where the + and - go. The last tab on the right of the chip is where your 3.3v+ wire (red) will go. Right next to it goes the negative wire (black). Now take your last wire (white) and solder it to the second tab. The very top tab is used for the 5 volt wire for the Gamecube, but since we are using an N64 controller we won't be needing it. Now that your controller is soldered you will need to solder the NES cord. There are also + and - signs and there is a G and W for the USB wires. Everything is still color coded just like the keyboard cord. Which is...
NES USB
Brown = Red +
Yellow = Black -
Orange = Green data
Red = White data
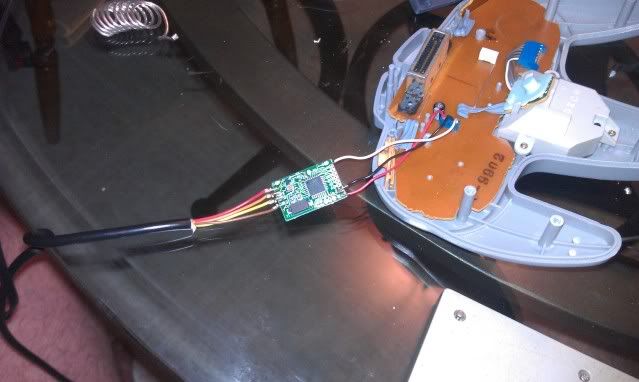
Cover the connections with hot glue on both sides to ensure that they won't break off. Once you've done that find a place to put it.
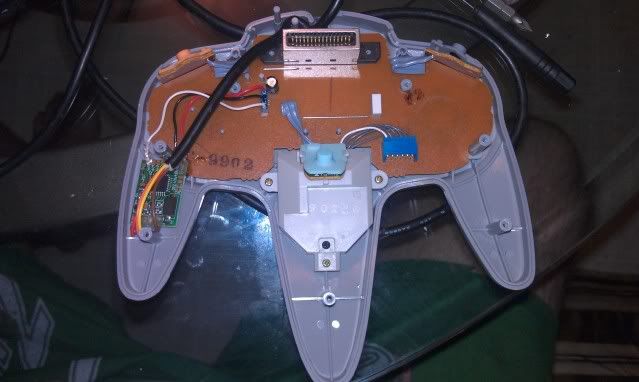
I put mine in the bottom left hand corner between the 2 screw holes.
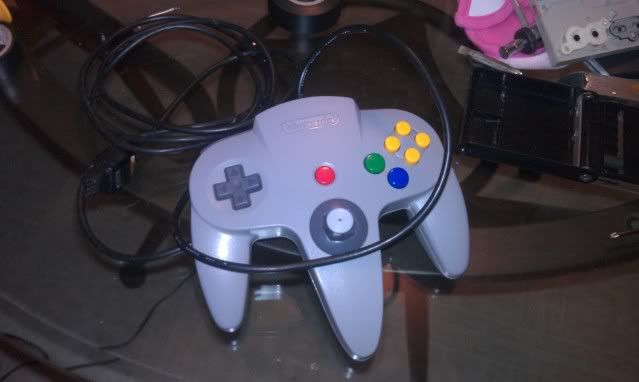
Lastly, reassemble everything and this is what you will end up with
Finally you can test you controller out. Plug it in to one of the front ports.
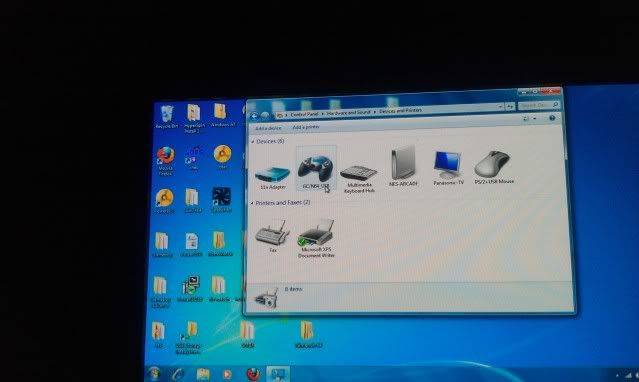
Windows will start installing the new hardware. So to see if everything installed correctly you will want to open your Control Panel and then click view hardware and devices and then this will pop up.
You should see GC/N64_USB. You'll need to open the properties to the controller and config the analog stick. If you don't do this then your your stick won't work like it should.
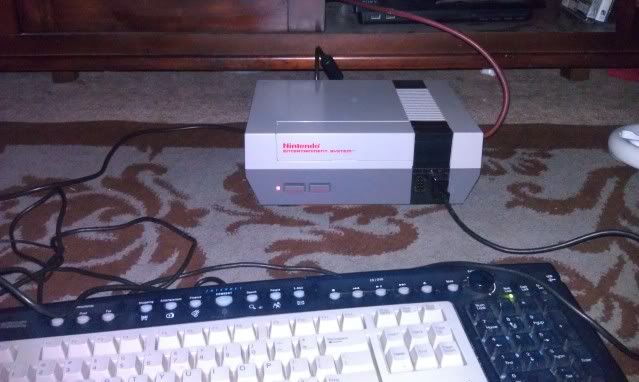
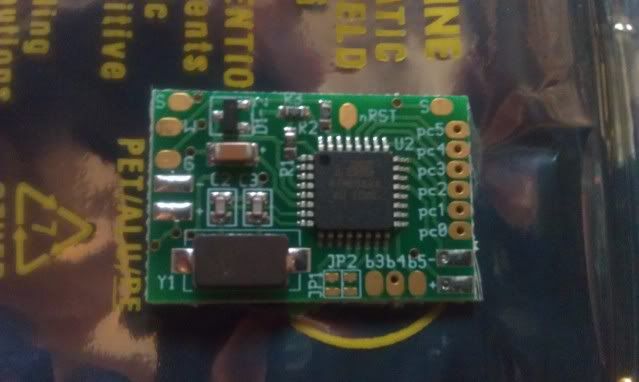
This is the chip that will allow me to convert the N64 controller to USB...or in my case NSB. It also works with gamecube controllers as well. I'm sure Ill be busy working on this come tomorrow sometime.
No it wasn't an electric shock I just received. It's the Nintendo ZAPPER!!!! Yeah!
Just picked one of these up while I'm waiting for my N64 chip to come. Which should be sometime next week. Ahhhh... the good old Nintendo Zapper. Not only did it look awesome, but the trigger clicking was amazing. To rig this bad boy up to the NES I'll be using the AimTrak kit from Ultimarc So it should be epic to say the least.
In other news...I'm considering(which usually means I'll be doing) a 4 score NSB hub. If you are wondering what the heck a 4 score is...I'll show ya.
With this bad boy I'd be able to have 4 players. Now how awesome would that be! Bomberman...here I come!
Just recently made the worst trade ever in the history of video games. While on my search for an N64 controller, I had purchased another (this time working) Nintendo with Blades of Steel for $5. I had soon come had soon come to realize that there wasn't any N64 controllers as I scoured this huge flea market. Upon leaving I had ended up finding one. The only problem was is that it was with the system. I ended up having to trade my NES and $10 for the stupid thing...just the controller...not the system. Which makes me the biggest idiot ever for doing it. I could of easily sold the Nintendo for a minimum of $25.
That wraps up today's post. Hopefully the next one will be full of N64 controller goodness.
Just a quick heads up. Tonight I just purchased the N64 usb chip from http://www.raphnet.net .
It sure beats paying $70 for one off of ebay. I'm pretty pumped and I'm hopin it will install just as smoothly as the ones from retrousb did. Tomorrow I'll be heading out to a flea market to hopefully pick up a controller or 2. As always I'll go through the install. See you then.
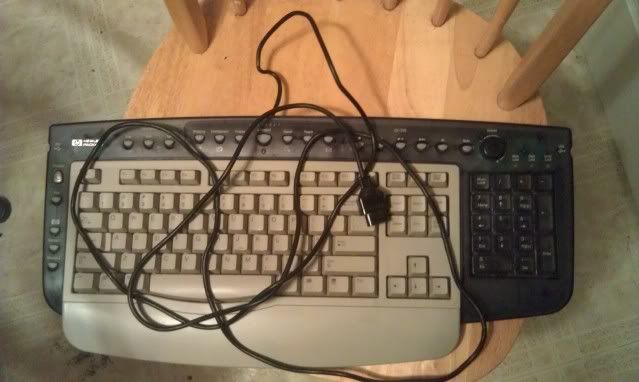
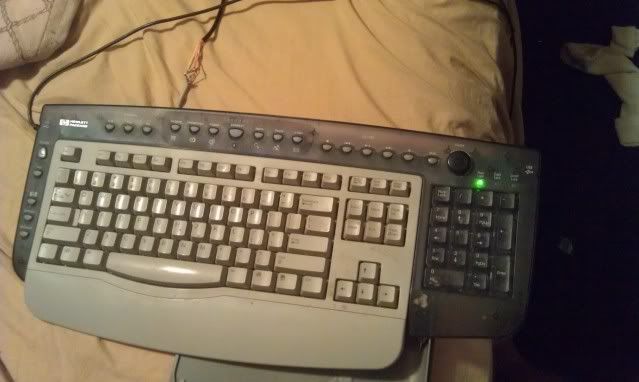
The keyboard is now fully assembled and here are the final results.
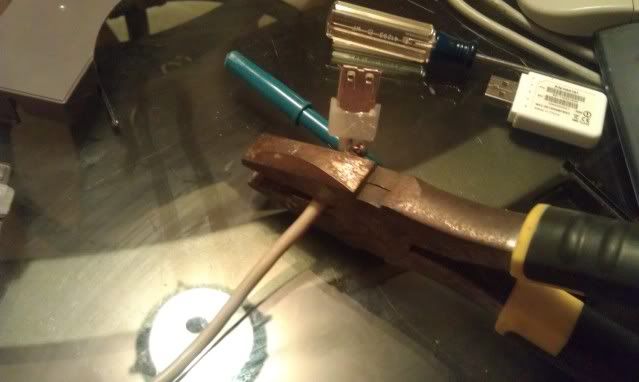
I soldered the NES cord to the keyboard USB cable. The wires are soldered as follows:
USB ---- NES Cord
Red ---- Brown
Green -- Orange
White -- Red
Black -- Yellow
The white wire is not connected to anything so its taped off. The wires are all now taped individually with electrical tape, and then all are wrapped together. Once everything is secure,reassemble the keyboard.
With the keyboard now assembled it's time to try it out.
*********CAUTION!!!**********
Please note that if you decide to try this mod that you are on you own. Which means that if you break your computer it's your fault.
With that being said please try this on a dummy computer aka an old junker first.
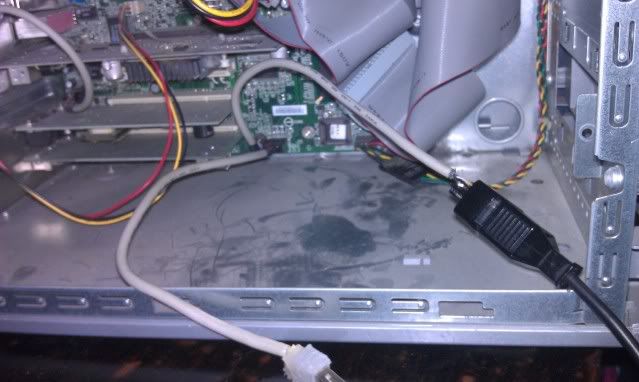
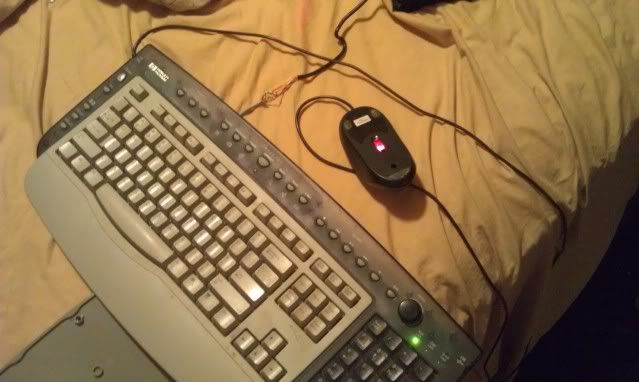
With everything now plugged in and ready to go, fire up the PC. If you did it correctly you shold have power to your keyboard. The keyboard I used also has usb ports so you can hook up a mouse as well.
Please note that these pictures were taken before the keyboard was fully assembled.
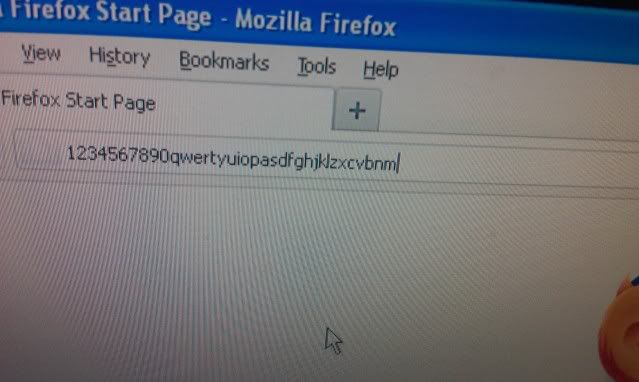
And if all goes well you should be able to do this
Well I can now say that it's officially been done. I now have a working NSB keyboard. It's done and working perfectly.
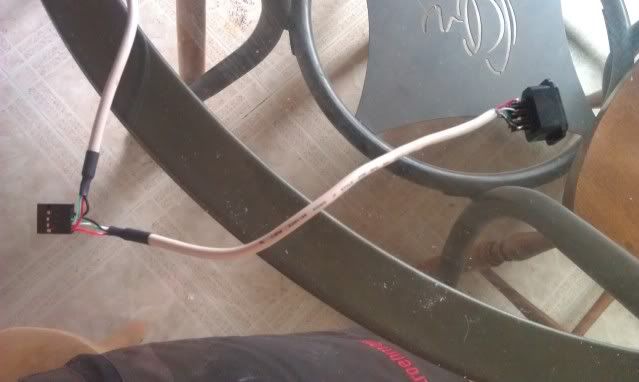
The first thing I did was cut the previous USB port that I had on the bottom of the NES. I stripped the wires down exposing the red,black,white,and green wires. I stripped a little bit off of each wire and added some solder and set it aside. I took my NES controller wire and did the same.
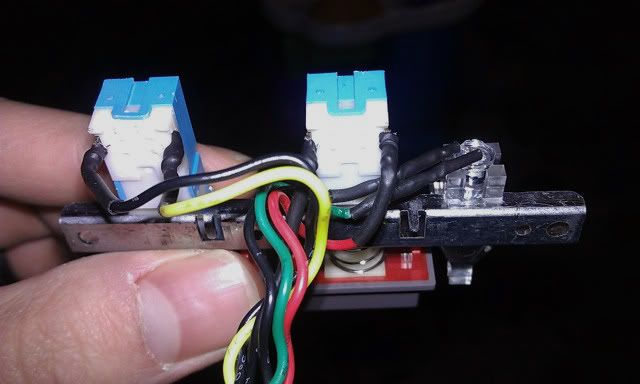
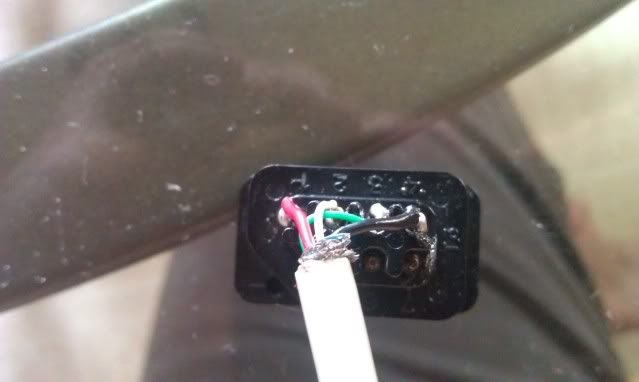
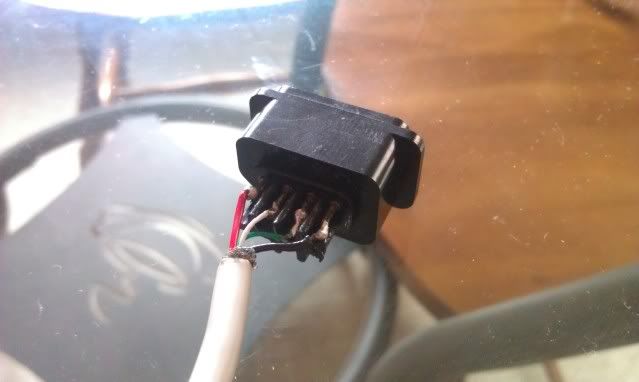
I then pulled out my NES Female ports from the build and removed the pins. They slide out very easily so you won't have to cut the wires. With the wires removed and the pins exposed, I added some solder to the pins. I used pins 1-4 on the port. They are numbered on the back. With the solder added, I took the soldering iron and combined the wires with the port.
The ports are wired as followed:
Port 1 = Red
Port 2 = White
Port 3 = Green
Port 4 = Black
And here is what you will end up with.
Later tonight I'll post Part 2 which will show the 2nd half of the build and the keyboard in action. It's going to be epic. :)
So I'm seriously thinking about converting my USB ports into NSB ports. What the heck is an NSB port you ask? Well it's essentially a USB connection where the female connection of the USB is the NES female port. Therefore all external USB connections will be required to have a male NES cord. I dont think its ever been done before. At least not that I know of. I can't really think of any reason why it wouldn't work, because all I'm doing is making the connection.
This also means that I'm going to have to get 2 more retro kits, and make each controller have its own chip. Which also means no NES controller hot swapping :( On a more brighter note though, I'll be able to add N64 and a special NES light gun converion to the mix...I may end up getting stuck using an adapter for the N64 since if you want a controller with a USB attached its like $70 and only one guy makes them,but I'll have to see what I can do.
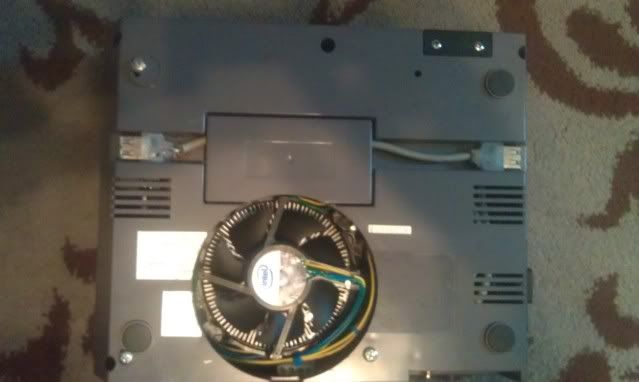
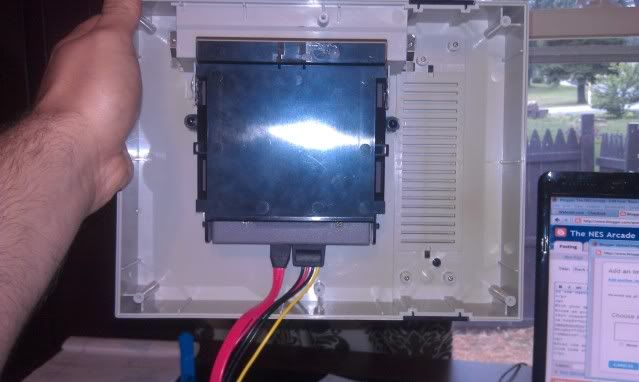
Oh and as a side note, the only real heat issues I'm having with the build is the hard drive,but its not enough to cause too much concern. I may move it out of the cartridge or I could try a couple of small fans,but we will see.
I added some USB ports on the bottom so I can set everything up. I got tired of opening up the case to work on the setup so I added these to make things easier.
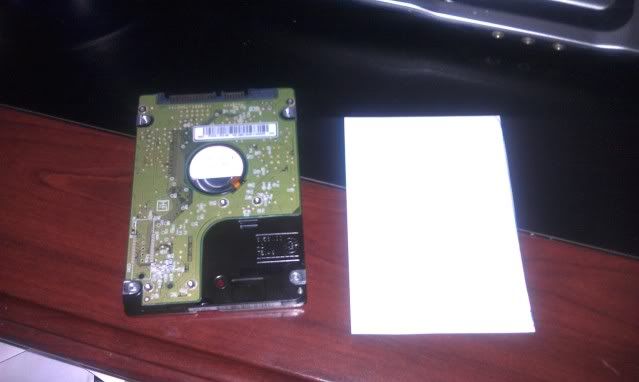
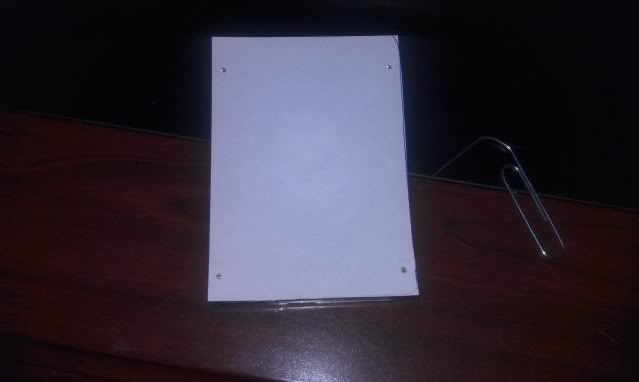
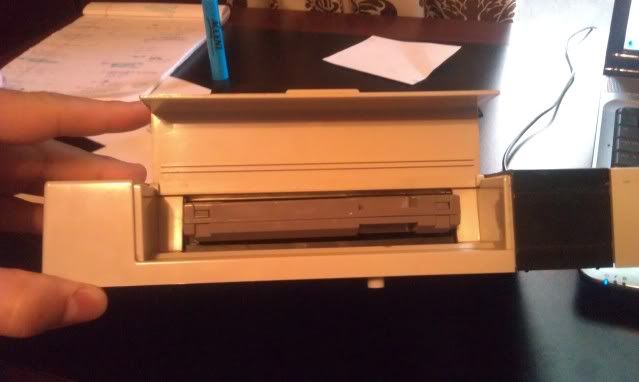
Finally after a nice long break I'm ready to get back at it. Today I mounted the hard drive inside the NES cartridge. It's one of the final steps I needed to make in order to make the system complete. Here's some pictures of the mounting process
I made a quick cut out of the hard drive
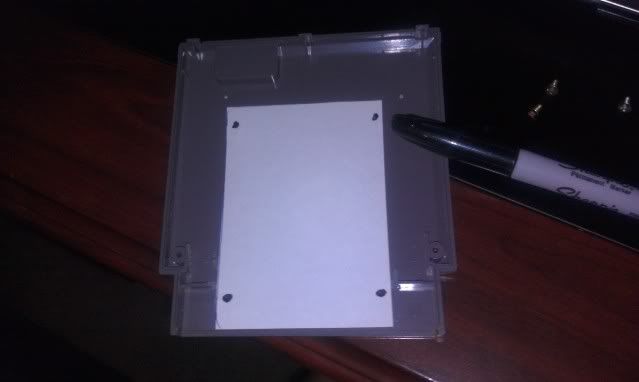
I then laid the cut out on top of the hard drive, and took a paper clip and poked holes into the bottom screw holes of the hard drive.
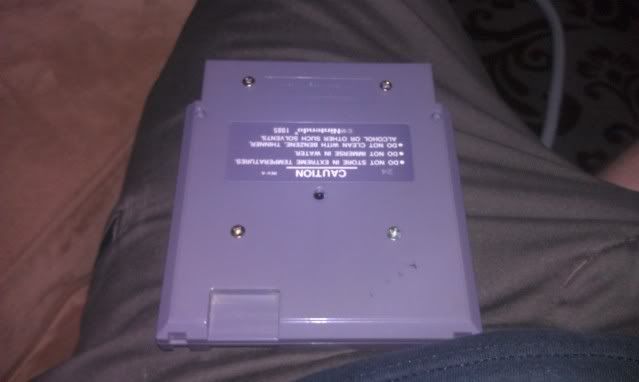
With your template made, place it onto the center of the bottom cartridge,and take a marker and mark the spots on your cartridge. As a a side note once you've opened your NES cartridge you'll need to take your dremel and cut away the center screw hole,the 2 little prongs, and cut all but 1/2" of the cartridge slot.
With your spots marked you'll now be able to drill the correct spots for your screw holes as pictured below.
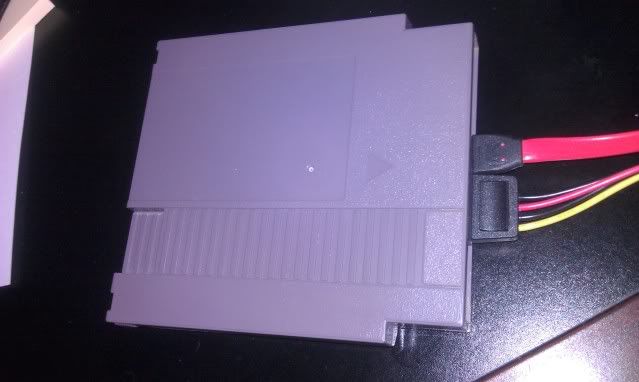
After the drive is mounted you'll close up the case, and you're final result will look like this.
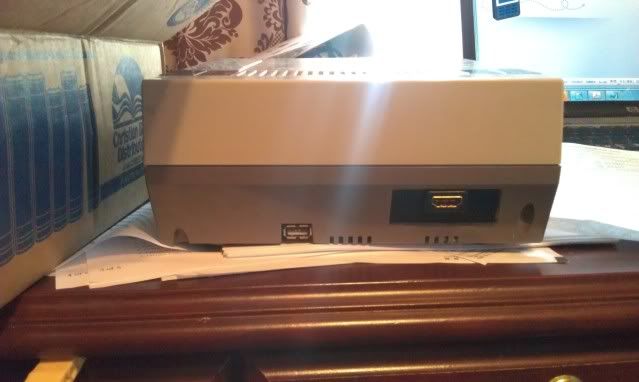
For over a month my project has been a stand still. I recently had a power supply and partial motherboard failure on my main computer. Luckily I am still able to access most of my files, but as you can imagine it has kind of put a damper on things. The Spintendo is working out nicely though and havent really run in to too many problems. Except with the hdmi cable cutting out because its cheap and was bent at a really odd angle. To solve that problem though I purchased a 360 degree swivel hdmi port and it seems to be working alot better. I am thinking about adding 2 usb ports underneath the plastic cover on the bottem, but i don't know if ill have enough room. The last thing I did was make 2 plastic holders for the power plug,wifi, and hdmi. So far they are working out well. Ill be on vacation again soon so I'm thinking about workn on it then, but who knows...
I've been busy working on a main theme for the Video Game Cartoons wheel. I call it NTV and have designed it after MTV from the early 90's. The logo in fact is designed after the MTV logo. Now I wasn't really in to MTV all that much growing up, but 2 obnoxious characters come to mind when I think of 90's television...Beavis and Butt-head or what I like to call them now...Buttario and Beavwigi. So without further delay...Here's a quick shot of what it looks like so far.
Everything you see has been completely redrawn/made in Illustrator.